
How to Upload Files to Google Drive
Follow the steps below to easily add files from your computer into your Google Drive. It is very important that you create a folder (or folders) of only the files you’re going to keep before you begin this process. Do not back up files that you won’t be using at Waterford anymore. A general rule of thumb is that if you haven’t used any of the files in the past school year or two, you likely will not be using them again. Getting a new computer is a great time to pare down and start fresh.
This folder you create can contain existing folders. They’ll all transfer seamlessly to and from Google Drive. For example, I’d create a folder on my computer called “Files to Keep”, then drag and drop all my existing folders (Canvas Pages, Photos, PDFs etc.) into that folder. I can then upload my whole “Files to Keep” folder into Google Drive and it will maintain the folder structure.
1. From your Google Drive click the large “+New” button. 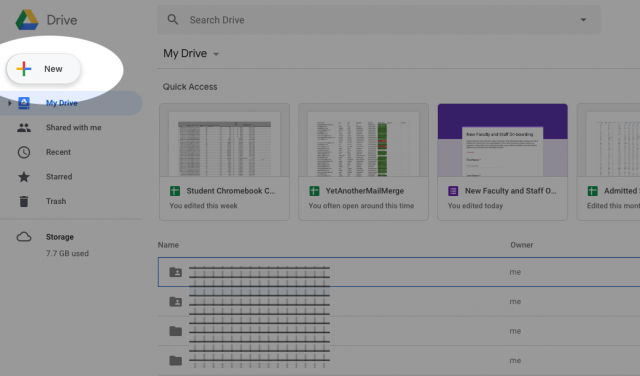
2. From the menu that opens, click the “Folder upload” button. 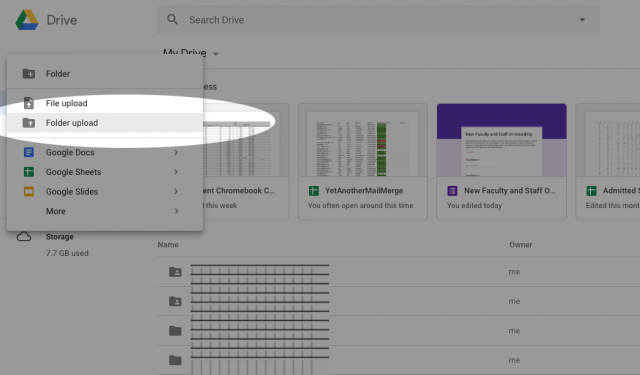
3. In the file picker window that appears, locate the folder you’d like to upload to Google Drive. Click on it in the window, and click upload. 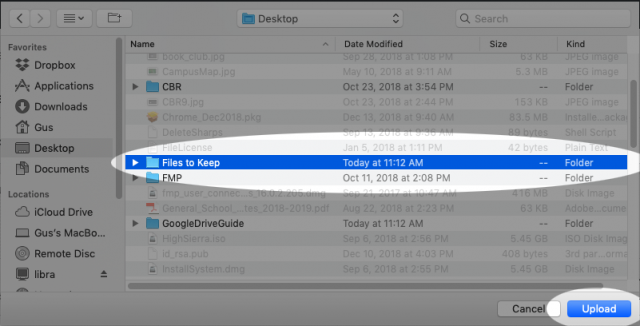
4. A confirmation window opens asking if you’d like to upload all of the folder’s contents to Google Drive. Click Upload. 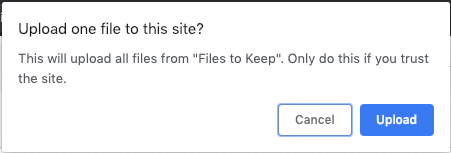
5. Your folder will then begin uploading. The time for this will vary depending on the amount of files you’re uploading. You’ll see an estimated time remaining. If your estimated time remaining is absurdly long, you’ll need to repeat these steps for but individual, smaller folders rather than combining them into one. When the folder is done uploading, you’ll see a confirmation. 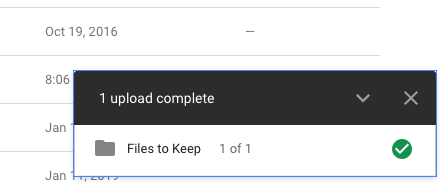
At this point your folder is uploaded into Google Drive. You can double-click on it like a normal Drive folder to view the contents. You may not be able to open all the files inside of Google Drive, but they will still come through on your new computer.