
Importing Veracross “All Classes” calendar to personal Google Calendar
Veracross creates a full calendar of all teaching assignments each year. This is called the “All Classes” calendar. Through a few steps, this calendar can be imported into your personal calendar (firstnamelastname@waterfordschool.org) so colleagues can more easily see your “free” and “busy” times. Like most guides, it is best to read through this once or twice before attempting the steps below. The whole process should take no more than 10 minutes. If you’d like help, you are welcome to come to the IT office so we can assist you in person.
Important notes:
- This is a one-way sync, so any classes that get added to your personal calendar will need to be changed manually if your schedule changes.
- This action cannot be undone, so any classes that may be removed or changed will need to be deleted manually.
- If you have not yet added the “All Classes” calendar to your Google Calendar, follow the first set of steps. If you’ve already subscribed to the “All Classes” calendar from Veracross, follow the second set of steps.
Steps for importing “All Classes” if the Veracross calendar has NOT been added to Google yet
- Login to waterfordschool.onelogin.com and click the “Veracross” tile, then sign in by typing your email and connecting with Google.
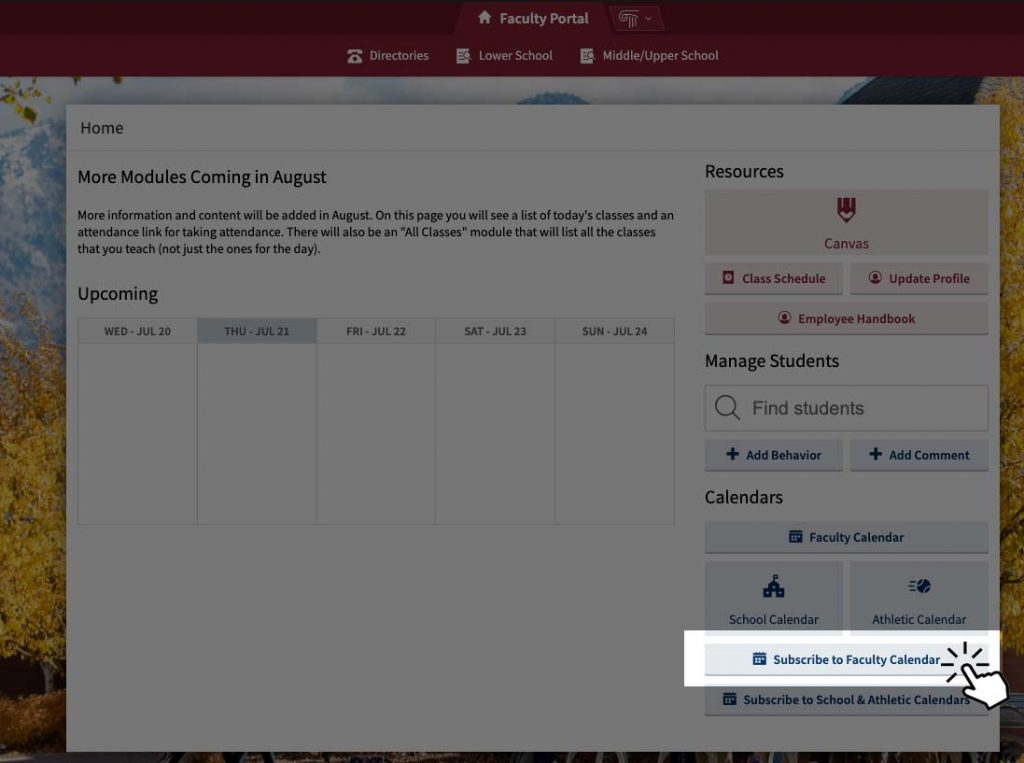
- Click the “Subscribe to Faculty Calendar” button:
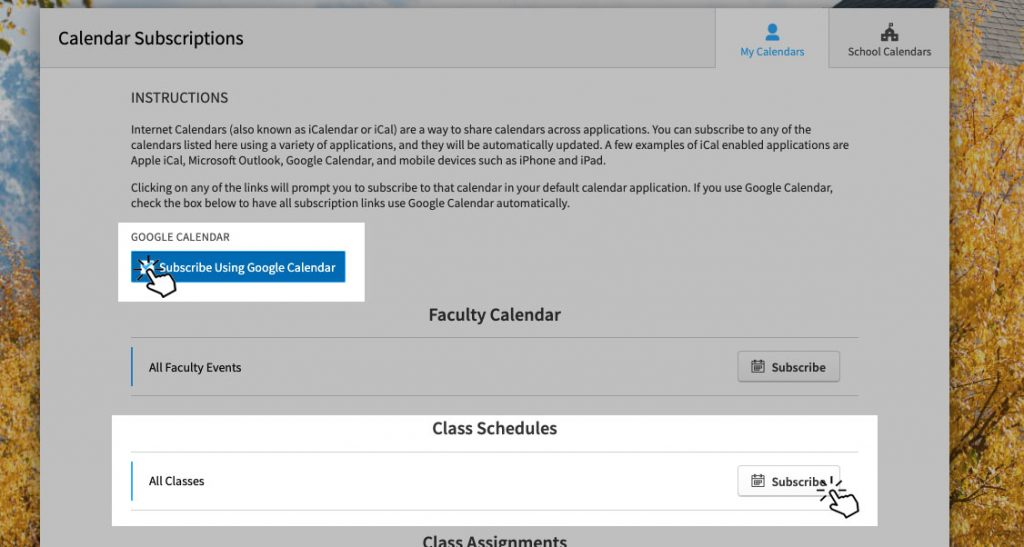
- Click the “Subscribe Using Google box”, then click “Subscribe” next to “All Classes”. Note: It is very important to make sure this step is being done from the “Class Schedules – All Classes” box as shown below:
- Your browser will switch to Google Calendar and launch an “Add calendar” popup. Click the “webcal://api.veracross…” three times quickly to select the whole URL, then press command+C on your keyboard or right click it and select Copy to copy the URL:

- Open a new tab in your browser (command+T on your keyboard or click the small plus button in the upper right of Chrome), and paste the copied URL with command+V or right-clicking and selecting paste in the URL bar at the top of the blank tab. Do NOT hit enter.
- Erase the pasted URL prefix, “webcal://” and type out “http://”. Be careful not to change any other part of the URL after the //. Hit enter. An .ics file will download to your Downloads folder:
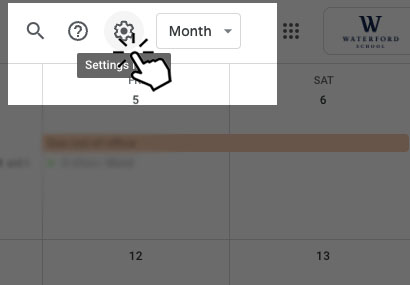
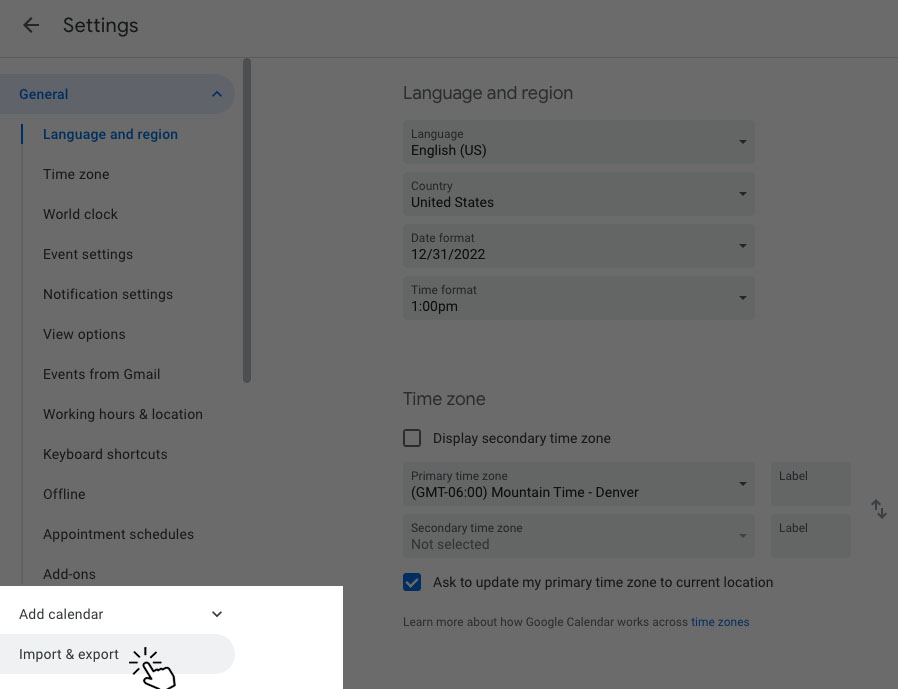
- From your main calendar.google.com page, click the gear icon in the top right followed by “Settings” to access the Calendar Settings menu

- Click “Import and export” at the bottom of the lefthand pane.

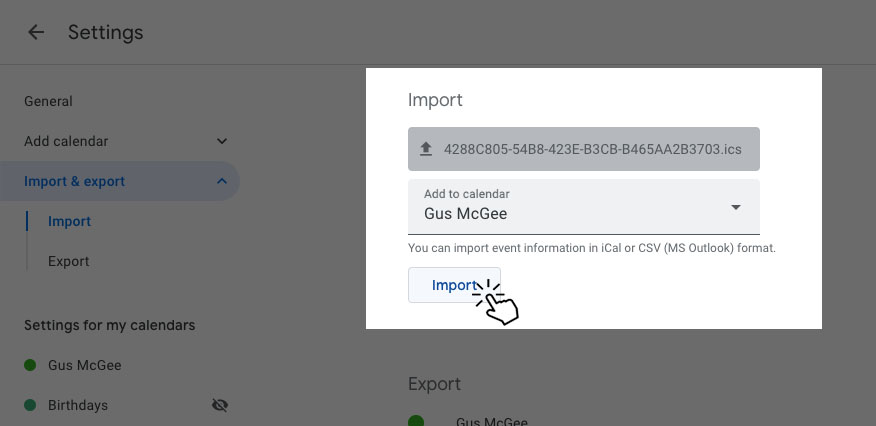
- Finally, click the “Select file from your computer” button. A file browser will open. Choose the file that downloaded from step 5. It will likely have a very long file name ending in .ics, such as, 4298C805-54B9-423E-B4CB-B465AA2B3703.ics. Double click the file, then click “Import” in the Settings page:
A success message should appear stating something similar to “405/405 events successfully added”. All of your classes are now added to your personal calendar.
Steps for importing “All Classes” if the Veracross calendar has already been added to Google
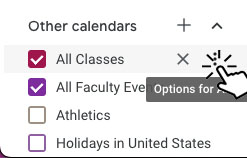
- Open your Google Calendar. Locate the calendar titled “All Classes” in the “Other Calendars” section in the lefthand pane of your Google Calendar and click the three dot menu next to the title. Note: It is very important to make sure you are clicking the three dots next to “All Classes” as shown below:
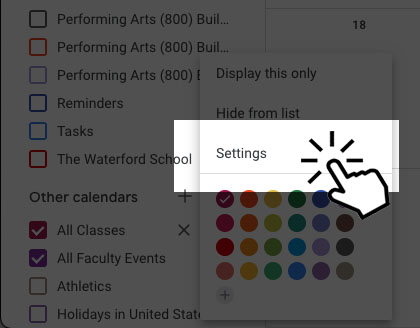
- Click “Settings”:
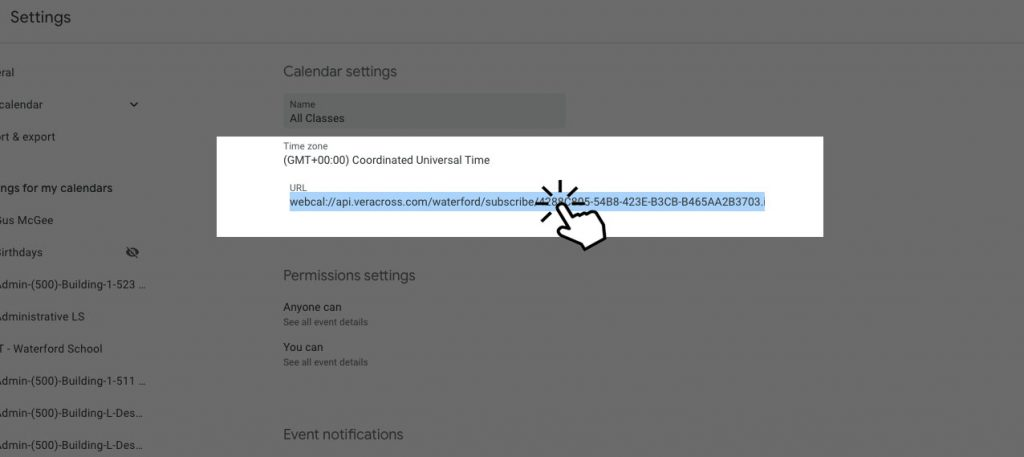
- At the top of the screen, there is a URL field that starts with “webcal://”. Click this link three times quickly to highlight the whole link, then copy the link with Command + C on your keyboard or by right-clicking and selecting copy:
- Open a new tab in your browser (command+T on your keyboard or click the small plus button in the upper right of Chrome), and paste the copied URL with command+V or right-clicking and selecting paste in the URL bar at the top of the blank tab. Do NOT hit enter.
- Erase the pasted URL prefix, “webcal://” and type out “http://”. Be careful not to change any other part of the URL after the //. Hit enter. An .ics file will download to your Downloads folder:
- From your main calendar.google.com page, click the gear icon in the top right followed by “Settings” to access the Calendar Settings menu:
- Click “Import and export” at the bottom of the lefthand pane:
- Finally, click the “Select file from your computer” button. A file browser will open. Choose the file that downloaded earlier. It will likely have a very long file name ending in .ics, such as, 4298C805-54B9-423E-B4CB-B465AA2B3703.ics. Double click the file, then click “Import” in the Settings page:

A success message should appear stating something similar to “405/405 events successfully added”. All of your classes are now added to your personal calendar.